Introduction

Introduction

This is a user guide for Qwizdom Actionpoint360 which allows you to create online courses by uploading PowerPoint presentations, PDFs, Youtube videos and other web documents, for trainees to access online.

Please note: Actionpoint 360 features require an annual subscription. Contact Qwizdom for pricing.

0 people did not find this helpful

Back To Top

Getting Started

Installing Actionpoint

To get started, install Qwizdom Actionpoint (PowerPoint plug-in). Requires v 4.5.0 or greater.

System Requirements

  • Windows 7, Windows 8, or Windows 10
  • MS Office 2013 or above

Installing Qwizdom Actionpoint

  1. Make sure all MS Windows and Office Updates are current.
    (If you are replacing an older version of Qwizdom Actionpoint, first uninstall the program via Control Panel > Programs.)
  2. Open and run the ActionpointSetup.exe file downloaded from: http://qwizdom.com/us/support/downloads
  3. The installer will check if your computer meets the minimum requirements, and automatically installs prerequisites, if necessary.
  4. Follow the prompts of the wizard to install the software then restart the computer when finished.
  5. Three icons will appear on your desktop, once installation is complete.
    Actionpoint: create online assessments and live interactive presentations.
    Survey Bar: survey your audience using an application of your choice.
    Answer Key: present and grade paper tests and activities.


0 people did not find this helpful

Back To Top

Actionpoint Overview

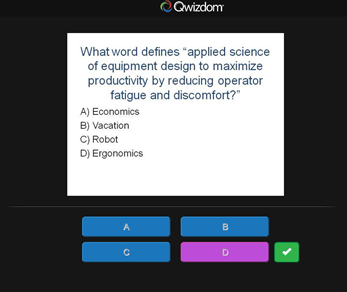
Use Actionpoint to create online assessments for participants to complete.

Actionpoint

To open Actionpoint, double-click the shortcut icon on your desktop.

(Alternately, load PowerPoint in the normal way.)


Click on the Actionpoint tab:

ppt_tabs


Overview of the Actionpoint Toolbar


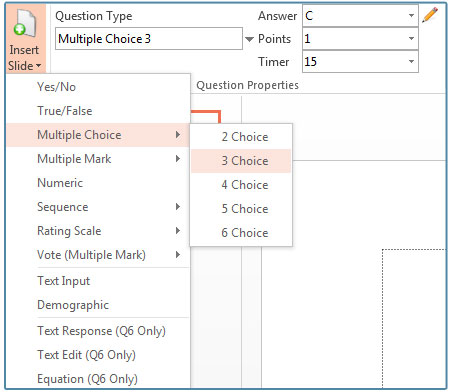
  1. Insert Slide: Use this feature to add slides to your presentation.
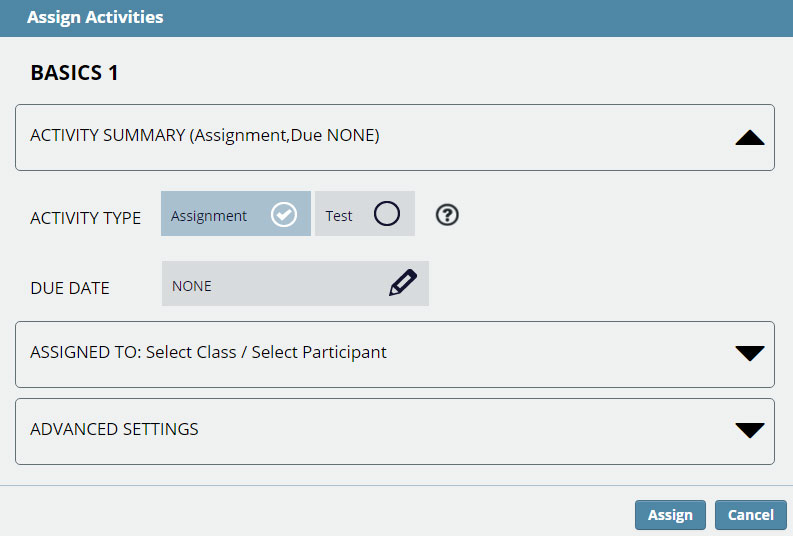
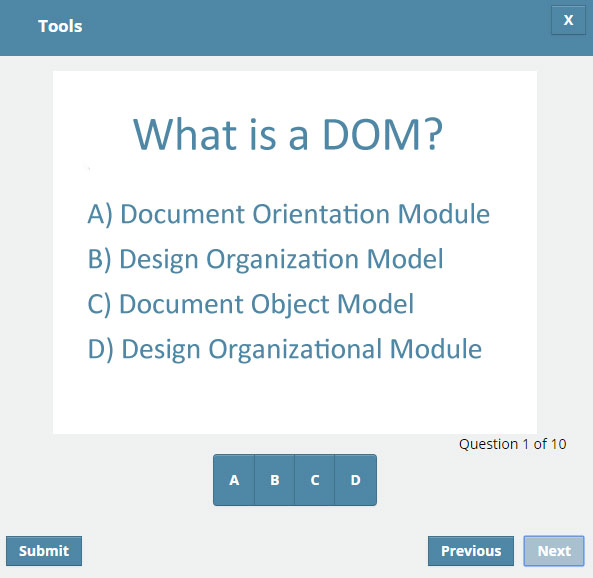
  2. Question Type: Online-compatible options: Y/N, T/F, Multiple Choice, Multiple Mark, Numeric, Sequence, Rating Scale, Vote, Text Input.
  3. Answer/Points/Timer: Designate an answer. (Point and time settings not applicable for online use.)
  4. Question Properties: Click the pencil icon to set advanced answer properties (depending on question type.
  5. Start Presentation: Click this button to access setup options for live presentations. (Not applicable for online use.)
  6.  Advanced Session: Resume a previous live presentation or begin in self-paced mode. (Not applicable for online use.)
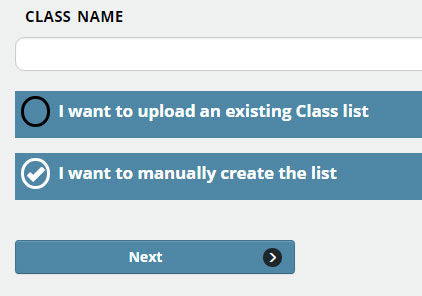
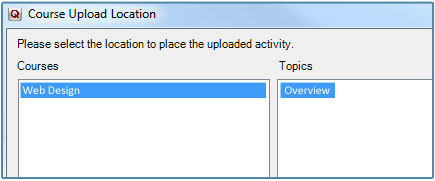
  7.  Participants Management: Create and modify participant lists. (Lists created here can be imported for online use.)
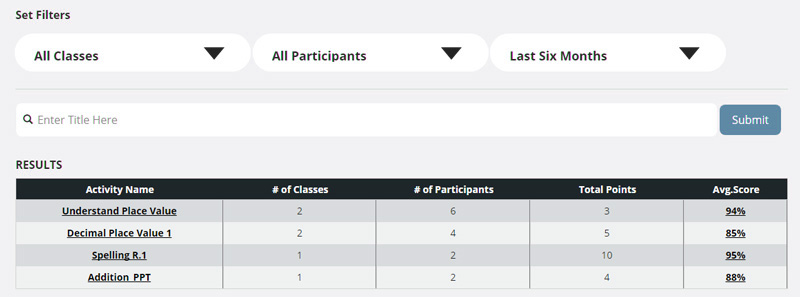
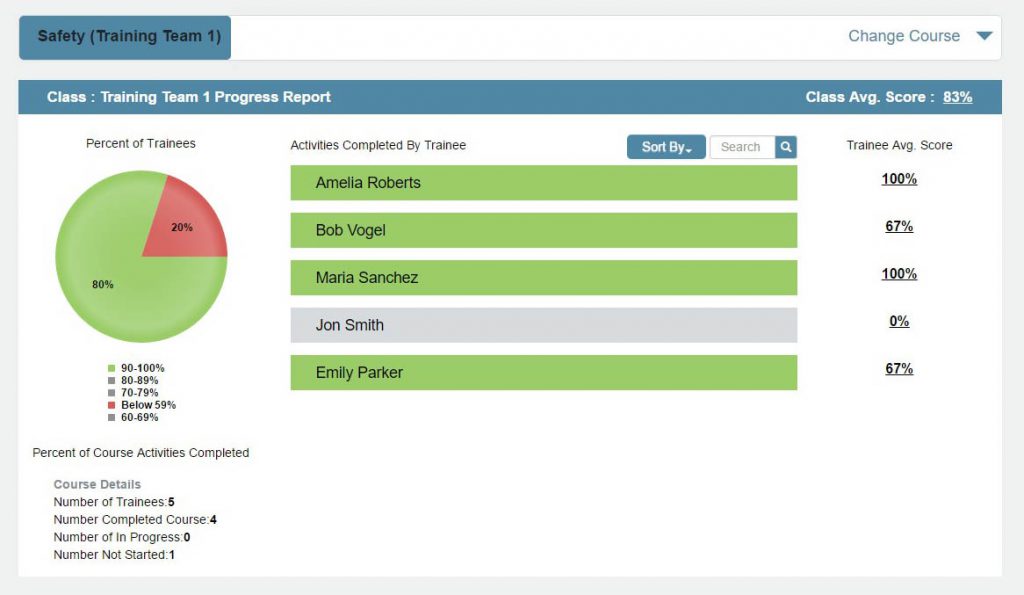
  8.  Report Generator: Browse for and view existing reports. (View results saved from live presentations or results exported from online.)
  9.  Remote Configuration: Set up your remotes for first-time use. (Not applicable for online use.)
  10. Advanced Options: Merge results files, edit speaker notes (Q7), set up Quandary game options, and print a question overview.
  11. About: Check software version number and user guide.


0 people did not find this helpful

Back To Top

Tag Slides for Online Assessments

To create an online quiz or activity you will need to tag your PowerPoint slides.

  1. Click Insert Slide on the Actionpoint toolbar and  choose a question type. (Select ‘None’ for slides not intended as interactional.)In this example, a multiple choice type of question, with 3 choices, is selected.
    tag_slide_sample
  2. Type the question and answer choices on the slide.
  3. In the Actionpoint toolbar, set the correct answer.
  4. Save the presentation when finished with all slides. (The presentation will save as a .ppt or .pptx file, but will retain the Actionpoint question/answer settings.)

0 people did not find this helpful

Back To Top

Online Class

Creating Online Class

  1. Login to actionpoint360.com
  2. Click on Classes.
    createclass
  3. Enter a name for your new class, then:
    Check the box for I Want to Manually Create the List, and follow the prompts.
    Or . . .
    If you have a .csv (comma delimited) roster, of if you already use the Qwizdom Actionpoint software and have a saved (.qpl) participant list, check I Want to Upload an Existing Class List and follow the prompts.

For all classes:

  •  Each participant UserID and Username must be unique within the organization.
  • When creating the list, the system initially makes the password the same as the UserID. Set up individual passwords as desired. Changes will immediately be encrypted, so keep a separate list to provide each student with the username and password assigned.

0 people did not find this helpful

Back To Top

QVR Polling App

Presenting with the QVR Polling App

The QVR Polling App comes bundles with Actionpoint360. Use this app to poll your audience during a live classroom session or online.

To begin a QVR presentation follow the steps below:

  1. Select an activity, then click Present to begin setting up a presentation.
  2. In the Presentation Setup window, select the presentation options (i.e. Participant List, Save Results and Present As).
  3. Click on Q-VR tab. Check Enable Web-Based Q-VR Support. Click Present to begin.
  4. Login with your credentials. (If you have not registered, click on the ‘New User’ button at the bottom of the window.)
  5. The Session ID will appear on the Qwizdom Toolbar. Click on the link to make the QVR Session ID number large. It’s helpful to create an instructional slide to help users login in.
  6. Instruct participants to login to the QVR session at qvr.qwizdom.com using a browser of their choice. Additionally, participants can download an app from the Google Play or Apple App store.
  7. In the QVR window, instruct participants to login with the 6 digit QVR Session ID number and then press Launch.
  8. Participants maybe asked to enter a User ID, if you selected a class list in the Presentation Setup window.
  9. Participants will see the presentation via their personal web-enabled device. If the show right/wrong feedback feature is turned on in the Presentation Settings window a green check mark will appear if the participant answered correctly. If an answer is incorrect, a red X will appear.
  10. The instructor can display a chart showing the results of all other users currently in the presentation.
  11. At the end of the presentation, this window will appear:

0 people did not find this helpful

Back To Top

Online Course

Set Up Online Course

  1. Go to actionpoint360.com and click Login.
  2. Enter credentials provided with the Actionpoint 360 purchase.
  3. In the Content tab, click Create New.
    add_content
  4. Name your Course, choose a color for the background tile, click Save.
    new_course_scrn
  5. Click Add Topic Header, name your first section/topic, click Create.
    add_topic_header
  6. Continue to add topics as needed to create an outline of your Course.
  7. Within a topic, click Add New Content to upload pdfs, Word docs, Youtube video, web links, and task directions.
  8. Click upload to add item to your course.

0 people did not find this helpful

Back To Top

Add Lesson or Quiz

Quizzes and assessments are added by uploading tagged PowerPoint presentations. See Tagging Slides for details.

  1. Open the saved .ppt or .pptx presentation and click on the Qwizdom Actionpoint tab.
  2. Select  Upload.
  3. Enter Actionpoint 360 credentials, click Login.
  4. If you have created a Course in the online system, it will appear in the Course Upload Location window.(A Course outline must previously have been created for the Actionpoint upload to work. See Set Up an Online Course.
    upload-window
  5. Select the location (Course and Topic) to place this presentation, click OK.

0 people did not find this helpful

Back To Top

Content

Assign Content

  1. Login to actionpoint360.com
  2. Click on Content and choose a previously created Course.
  3. Select an activity (or Topic Header for a group of activities), drag and drop to calendar date, or click to open menu and choose Assign.(Drag to the ‘Access Anytime’ area to make available with no due date.) The Assignment Window will appear.
    assignment_window
  4. Select Activity Type: Assignment or Test.
    (Assignment = right/wrong feedback with no answer change. Test = answer change with no right/wrong feedback.)
  5. Select class or individual student(s).
  6. Optionally, click Advanced Options to:
    Set Start Date: The date in which the activity appears in the participant view.
    Expiration Date: The participant can no longer take the activity after this date.
    Time Limit: Add time limit to activity (default is set to 00:00).
    Set Mastery Level: Scored that is considered passing (default set at 70%).
    Add Comments
  7. Click Assign.

0 people did not find this helpful

Back To Top

Participant Content Player

  1. To complete assignments, participants log onto actionpoint360.com with credentials provided by trainer.
  2. Click on an item to begin.
    participant_view1
  3. The Content Player appears:
    (At this time the online player does not support animations, links, or videos within the presentation. To add web content to the course, see Section 4 Set Up an Online Course.)
    participant_content_player
  4. Participant walks through the lesson. If show right/wrong feedback feature is turned on a green check mark will appear if the participant answered correctly. If an answer is incorrect, a red X will appear.
  5. At the end of the activity, the participant will see their score.

0 people did not find this helpful

Back To Top

Online Results

View Results

  1. Click on Results. This will bring up the Activity Search page.
  2. Set the Class, Participant and Time filters to view results on multiple activities, or type in a specific activity to return results on a single activity. Make your desired selections and click Submit to return results.
  3. Click on the Activity Title or Avg. Score to view class and participant scores.
  4. To view the overall course performance click on the View By menu and select Progress Report.
  5. Click Results and choose Course to view class progress.
  6. Click on Class Avg Score, or specific participant, to see average score on each activity assigned.
    progress
  7. Drill in further and select different report views to analyze results.
    1results2
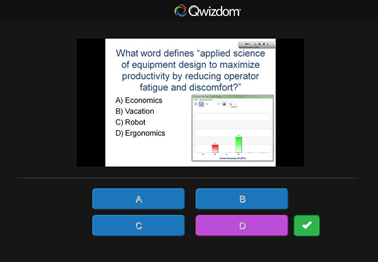
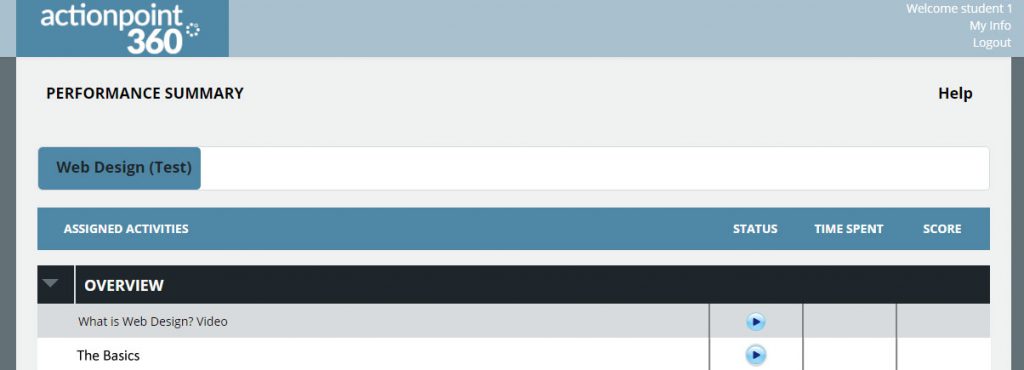
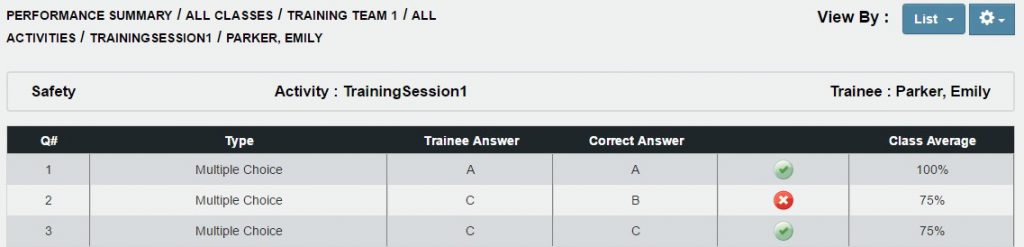
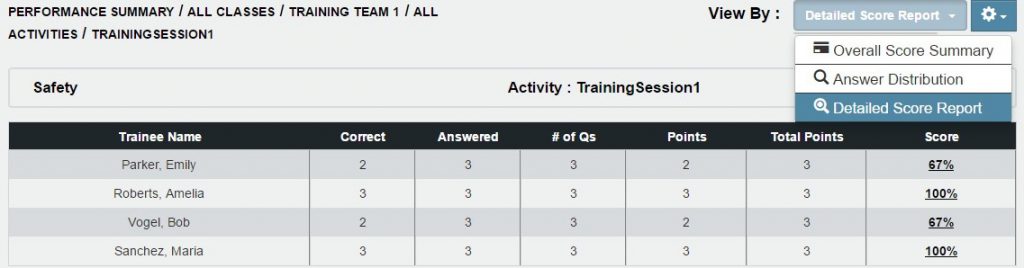
Detailed Score Report Sample:
    1results3
  8. Results for a given activity (or entire course) can also be exported as a .qpl file, compatible with Actionpoint software, for even more reporting options. (For more information, see the Actionpoint Quick Start, and Full User, Guides at (http://qwizdom.com/us/support/downloads)
    export

0 people did not find this helpful

Back To Top