Follow the steps below to set up remotes. Be sure the HID or RF host* is properly installed before proceeding.
* v.938 host or higher is required for Qwizdom Connect. If the host is not v.938 host or higher, please contact Technical Support.
- Click the Remotes menu.
- Select Configuration Preferences. The Remote Preferences window opens.

- Type in the number of remotes in your set(s).
- Select only the remote types you are using.
- Select your preferred configuration. Use Fixed Set unless the remotes are participant-owned. See below for details.
- Newer remotes, received in 2012 or later, already come with pre-assigned numbers, matching their affixed stickers, so no further action is required. Click OK to finish.
Please Note: If you received your set in 2011 or earlier, click the Assign Fixed Remote IDs button. Read the dialog box, and click Continue to start assigning Remote ID numbers. (See Assign Remote IDs below for details. )
Other Settings & Explanations:
- Enable Backlight – activates the backlight on the Q5RF participant and Q5RF Instructor Remotes.
- Using Q4 remotes older – check this to assign Remotes ID numbers to older Q4s. To check the version number, turn on a Q4 remote by holding down the Menu key. The version number will appear on screen.
- RF host (Red Base)
- HID RF host (Black Base) – most Commonly used host.
- Roaming Set or Participant Owned– check this option if the participants own the remotes. This mode is best-suited for Higher Ed/University settings. Participants are required to either enter a session ID and participant ID to join a presentation.
Assign Remote IDs
Remotes received in 2011 or earlier need to be set up once, prior to use, with computer-assigned ID numbers. Newer remotes, received in 2012 or later, already come with pre-assigned numbers, matching their affixed stickers, so no additional setup is required.
- Plug in your host.
- In the Remote Preferences window, select Set with remote IDs and click the Assigned Fixed IDs button.
- In the Remote Assignment window, check Auto-Increment Remote Number to assign numbers in the order in which remotes are turned on.
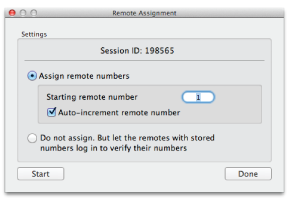
- Click Start.
- Begin turning on your remotes. When a remote connects with the host, its assigned ID number will appear on the remote’s LCD screen.
- This process only needs done once—the assigned number will remain fixed with that remote. If desired, use a marker, or affix a sticker, to designate the number that has been assigned to that remote.
- If your remotes do not connect, they are not configured with the correct Session ID. See Changing Session IDs, below for details.
- Click Stop when all remotes have been assigned. Click Done to close the window. Remotes will turn off automatically.
Assign Remote IDs – Q4 Remotes with Firmware Older than Version 1.34
The following directions only apply for customers using Q4 remotes older than version 1.34. (The Q4 firmware number is displayed on the remote’s screen when the remote is first turned on.)
- Insert host into the USB port of your computer.
- Open Qwizdom Connect, click on the Remotes menu, and select Configuration Preferences.
- In the Remote Preferences window, check the box for Using Q4 Remotes Older Than Version 1.34.
- Select Set with remote IDs and click the Assigned Fixed IDs button.
- Turn the remotes on. When the remotes communicate with the host, the serial number and the remote’s assigned ID number will appear in the window. If the remotes are prompting for the session ID, enter the session ID that is displayed at the bottom of the Assign Fixed Remote ID window.
- After all the remotes have been assigned, click Done to exit the Assigned Fixed Remote IDs window.
Please Note: You only have to assign fixed numbers once, unless you change computers or hosts.
Changing Session IDs
If the RF remote or tablet displays No Net, Not Found, Not Active, or Inactive, it could be that the session ID is not correct.
- For Q2RF remotes: wait for the remote to time out and turn off. When you turn it back on, press the Help key. When you see –S on the display, it is prompting you for the session ID. Enter it and press the Send key to confirm.
- For Q4RF remotes: press the Menu key, use the right arrow to scroll to Sess. ID., and press the Send (double arrows) key to select the option. You will see the current session ID and will be asked if you want to change the session ID. Press T (Yes) to change. Enter the session ID and press the Send (double arrows) key to send.
- For Q5RF remotes: wait for the remote to display No Net, Not Active, or Not Found. Press the Menu key and select Enter Session ID using the Send (double arrows) key or the circle key on the thumb pad. Enter the session ID and press the Send (double arrows) key.
- For QVOTE and Q6RF remotes: press the Menu key, scroll to Enter Session ID, press the
 Menu Select key, reenter the Session ID, and press Join to submit.
- For Q7 tablet: press the Menu key and use the Scroll button to select Enter Session ID. Press the Enter key to select it and enter the session ID. Press the Enter key to confirm.
What is a Session ID?
Each host/receiver has a unique six-digit called a Session ID number. Session IDs “assign” the remote to the host, allowing the remote to only communicate with that specific host.
The Session IDs can be found:
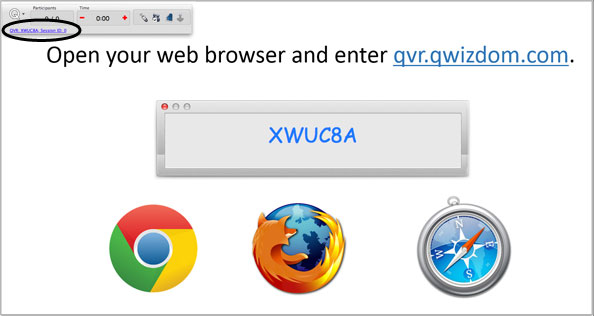
- For both HID (Black) and RF (Red) host, the session ID can be found in the Assigned Fixed Remote IDs window, the Login tab in the Presentation Setup window, and the Login tab during a presentation in the Qwizdom Tool. See Presentation Features for details.
- For the HID (Black) Host, click
 Qwizdom Tools, found in the top right-hand corner of your computer screen. The Session ID will be displayed at the top of the menu.
- For the RF host, the session ID can be found on the bottom of the device on a white sticker.
You can also create your own Session ID in the Presentation Setup window. Creating your own Session ID does not change the host’s default Session ID. See Presentation Setup for details. The Session ID must be unique because if there are other hosts in the same building, the remotes will not know which host to connect with.
